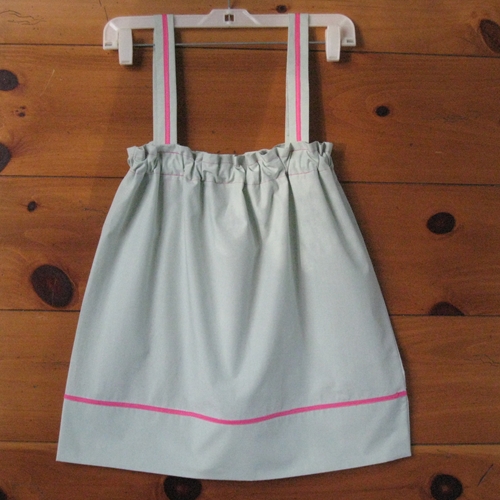
How to make a pillowcase top girl's shirt.
Supplies Needed:
Pillow case, Elastic length the circumference of a child around the chest under arms, Decorations as desired
Lets Get Started:
Wash and iron a pillow case. Determine length of the top by measuring child under arm pit to length desired at waistline. Add to this measurement 2 inches for casement plus ¼” for turn under of raw edge. Use the measurement to cut the pillow case on the sewn side, measuring from the hem, as the pillow case hem will be used for the hem of the top. Iron raw edge turn under at ¼” and then again at 2” to form casement. Sew around the casement to secure at the ¼” side and then again about ½” from the fold at the top to form a ruffle.
Measure around the chest of the child under the armpit to a comfortable length for elastic. Open the side seam of the inside of the casement and using a large safety pin string the elastic through the casement and sew the two ends by machine to complete the circle. Be careful the elastic does not get twisted. Sew the casement closed.
Put the garment on the child and measure from the bottom of the front casement over the shoulder and to the bottom of the back casement. Using the remaining pillow case make shoulder straps about 3” wide by the length desired. Sew right sides together leaving a hole in the middle of the long edge about 2” long to turn the straps right sides out. Turn right side out and iron. Sew opening closed by hand or machine. Add decorations to straps now if desired. Sew the strap to the inside of the top about 3” to 4” from the underarm seam on both sides. Sew right over the existing casement, sewing at the bottom and then again at the top of the casement. This will make the attachment of the straps less visible. Repeat on the other side. Add decorations to the top as desired.
Congratulations you have made a very cute top for a little girl.