How To Make A Pillowcase Apron
Supplies Needed:
Pillow case, Decorative fabric for pocket, Bias tape, extra wide double fold, 4 yards
Lets Get Started:
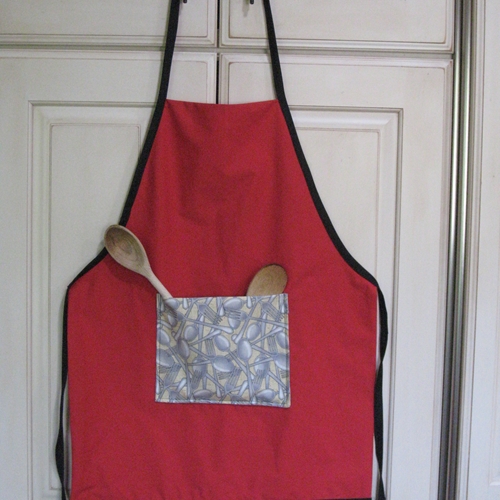
- Wash and iron pillow case. Crease along the sewn seam and the fold seam with iron. Compare length of pillow case to desired length of apron. Cut off sewn, short side of the pillow case to shorten. The hem will be a hem on the apron. At the top, measure in about 5” from the sewn and folded long edges, mark with pins. Between these pins will be the width of the apron at the top. Measure down (about 11” on sample) from the short sewn end (top of apron) to your waist or place where you want the ties coming off your side. Take a platter and place the more curved end by the waist point and the straighter end by the 5” mark. Cut with a rotary cutter or mark and use scissors along this edge. Repeat on the other side using first cut out as a guide. If you have trimmed the top off to shorten, turn the pillow case inside out and sew the top of the apron closed. Turn right side out and iron to form a crease at the top. Add pockets or decorations as desired. Pocket shown was placed 1” below the cut out.
- Take 4 yards of bias tape and find the center. Find the shorter edge of the bias tape and orient this to the right side of the apron. Measure down 12” on each side and pin these to the top corners. Slip this over your head to see if this is an adequate opening or make adjustments equally on each side. When you have the correct head opening, pin the bias tape (short side on the front of apron) along each of the side curves. With the apron to your left and right side face up, start sewing at the end with a fold of bias tape into itself so the raw end is not exposed. Sew end closed; then sew along the edge with the short edge of the bias tape facing up. Continue sewing onto and around the apron to the very end where you can again tuck the tape end into itself so there are no raw edges on the last tie.
- Congratulations you have made a very useful apron.
Please Pin & Share this Photo. Thank you!