How To make A Pillow Case Dress.
Supplies Needed:
Double fold bias tape 27” for each armhole. 2 dresses from each package. 14” or 18” elastic ½” or ¾ “ wide for each dress, pillowcase any size.

Lets Get Started:
Take any size pillow case and wash and iron it. Using a rotary cutter and a ruler, line up the ruler along the sewn short edge to make a cut to remove the sewn seam side of the rectangle. Making the edge straight with the sides will assure the dress hem will be even. The hem of the pillow case will be the hem of the dress.
Looking at the edge you just cut, measure in 4” off both sides of the corner of the rectangle. Mark the 4” measurement and take a cereal bowl and line them up with both marks. Using a small rotary blade, cut around the cereal bowl to make the bottom of the armhole. Repeat on the other side of the cut edge corner to make the other armhole. For a king size pillow case, I suggest you measure 5” along the dress edges so the armhole is a bit bigger for a larger girl.
Choose Fun Colors for Pillowcase Dresses

The top front and back of the dress has a 7” elastic casing or 9“ for a king size pillow case. You can use ½” or ¾” elastic. First press down ¼” between the armholes and then press down another amount to allow for your elastic size. Sew across. Repeat on the front or back. I use the same color thread as I use on the bias tape so there is an accent and tie in with color. String the elastic through the casing using a large safety pin. Be sure to sew the elastic on the ends securely.
Next, the double fold bias tape is used to secure the armhole and make the ties on the shoulder. Take the 27” piece of bias tape and find the center. Using the short side of the bias tape, unfold it and put the right side of the bias tape to the right side of the dress on the seam or fold line at the bottom of the armhole.

Pin extensively in place up to and including the elastic casing on both sides of the armhole. Use the first fold of the bias tape next to the raw edge of the armhole as a guide to sew the bias tape around the armhole only. Be sure to secure it with back stitching at the elastic start and end. Open up the ends of the bias tape once so you can see the center fold in the middle but not all the way open. With the bias tape ends facing you cut a small “V” on the end. Fold the point of the “V” up and away from you so the point goes toward the dress. The bias tape point is wrong side to wrong side at this point and the tip is on the fold. Close the bias tape back into itself. This prevents excessive bulk at the tip of the tie.
The front of the dress should be right side up and to your left with the short end of the bias tape up; sew the folded tip closed back and forth so it is secure. With the sewing machine needle down and next to the fold edge of the bias tape rotate the tape so you are sewing next to the fold edge all the way down to the elastic. When you get to the elastic, start stitching in the ditch between the edge of the bias tape and the front of the dress, making sure your catching the longer edge of the bias tape on the bottom. Be diligent about capturing the raw edges of the armhole as they want to curl out of the bias tape on the bottom. Sew off the elastic on the other side and when you get close to the end of the bias tape, fold it and secure it the same way as the other side. Repeat for other armhole.
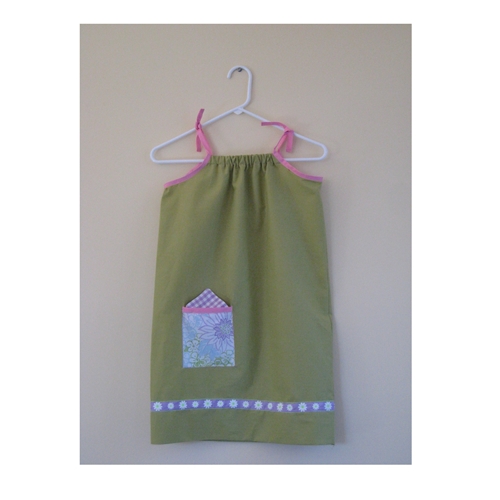
Tie the bias tape into a square knot. Decorate with appliques, various stitches, pockets, embroidery or anything else your imagination allows.
Congratulations, youve made a wonderful dress for a little girl.
.jpg "How to Make a Pillowcase Dress")